In today’s digitally connected world, a strong and reliable internet connection is more important than ever. Slow or weak Wi-Fi signals can be frustrating, leading to interrupted video calls, leggy online gaming, and endless buffering during your favorite shows. Fortunately, there’s a solution: the Rock Space Wi-Fi Extender. In this comprehensive guide, we’ll walk you through the setup process step by step, troubleshoot common issues, and answer frequently asked questions to ensure you get the most out of your extender.
The Rock Space WiFi Extender is your ticket to seamless internet connectivity throughout your home. Whether you have dead zones in your living room or a weak signal in the basement, this extender promises to amplify your Wi-Fi signal, providing a stable and speedy internet connection to every corner of your space.
Why Choose the Rock Space Wi-Fi Extender
Before we dive into the setup process, let’s explore why the Rock Space Wi-Fi Extender is an excellent choice for improving your home network.
Enhanced Coverage
With its powerful amplifiers and high-gain antennas, the Rock Space extender extends your Wi-Fi coverage, eliminating dead zones and ensuring a strong signal even in the farthest corners of your home.
Easy Installation
Setting up the Rock Space Wi-Fi Extender is a breeze, thanks to multiple setup methods, including WPS, web browser configuration, and manual setup.
Fast and Stable Connectivity
Enjoy lag-free online gaming, smooth video streaming, and speedy downloads with the Rock Space extender, which boosts your existing Wi-Fi signal to provide a reliable connection.
Getting Started
Now that you’re convinced of the benefits, let’s get started with the setup process.
Unboxing Your Extender
- Open the Rock Space Wi-Fi Extender package and check for the following items:
- The extender unit
- An Ethernet cable
- A user manual
- Ensure all components are in good condition.
Choosing the Right Location
The success of your extender largely depends on its placement. Here’s how to choose the ideal spot:
- Position the extender midway between your Wi-Fi router and the area with weak signal coverage.
- Keep the extender away from obstructions such as walls and electronic devices that may interfere with the signal.
- Ensure the extender is within the range of your existing Wi-Fi network.
Setup Methods
The Rock Space WiFi Extender offers three convenient setup methods to suit your preferences.
Using WPS (Wi-Fi Protected Setup)
- Plug the extender into an electrical outlet within the range of your Wi-Fi router.
- Press the WPS button on your router and hold it for a few seconds.
- Within two minutes, press the WPS button on the extender.
- Once the connection is established, the extender’s LED indicator will turn solid green.
Configuration via Web Browser
- Connect your computer or mobile device to the Rock Space Extender’s default Wi-Fi network (usually named “Rock Space Extender”).
- Open a web browser and enter “re.rockspace.local” in the address bar.
- Follow the on-screen instructions to complete the setup, including selecting your existing Wi-Fi network and entering the Wi-Fi password.
- Once configured, your extender will restart, and you can connect your devices to the extended network.
Manual Setup with an Ethernet Cable
- Connect one end of the provided Ethernet cable to your extender and the other end to your computer.
- Plug the extender into an electrical outlet.
- Open a web browser and enter “re.rockspace.local” in the address bar.
- Follow the on-screen instructions to configure the extender manually, including selecting your existing Wi-Fi network and entering the Wi-Fi password.
- After setup, disconnect the Ethernet cable and connect your devices to the extended network.
Troubleshooting
Even with the straightforward setup process, issues can sometimes arise. Let’s troubleshoot some common problems.
Rockspace Extender Not Powering On
If the extender does not power on:
- Ensure it is plugged into a working electrical outlet.
- Check the power indicator on the extender.
- Try a different outlet if necessary.
Failed Connection to Router
If the extender cannot connect to your router:
- Verify that you followed the setup instructions correctly.
- Ensure your router supports WPS if you are using the WPS setup method.
- Check your Wi-Fi network’s password.
No Internet Access
If you have a connection but no internet access:
- Confirm that your router is online and functioning.
- Check the extender’s LED indicator for any issues.
- Restart both the extender and your router.
Rockspace Extender Not Broadcasting Wi-Fi
If the extender is not broadcasting Wi-Fi:
- Ensure the extender is properly configured.
- Check the Wi-Fi settings in the extender’s web interface.
- Reboot the extender.
FAQ
Connect to the extender’s Wi-Fi network, open a web browser, and enter “re.rockspace.local” or “192.168.0.254“in the address bar.
The extender is compatible with most routers, but it’s essential to check compatibility with your specific model.
You can perform a factory reset by pressing and holding the reset button on the extender. This will erase all settings, including login credentials.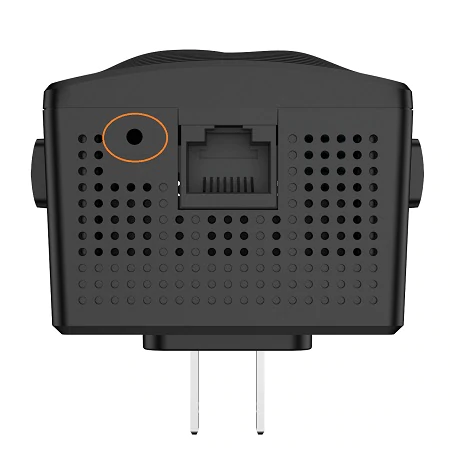
Yes, it supports both 2.4GHz and 5GHz bands, providing flexibility and better performance.
The Rock Space WiFi Extender is your key to a robust and seamless internet connection throughout your home. Whether you opt for WPS, web browser configuration, or manual setup, you can trust this device to extend your Wi-Fi coverage effectively. Say goodbye to dead zones and hello to uninterrupted connectivity with the Rock Space WiFi Extender Setup.
Boost your Wi-Fi signal today and enjoy a more connected and hassle-free digital experience!