Rockspace WiFi extenders are popular for boosting weak WiFi signals. You don’t need technical skills to set it up—just follow these steps using the setup page.
Time needed: 5 minutes
Step-by-Step Rockspace Extender Setup
- Plug in the Extender
Insert your Rockspace extender into a power outlet near your router. Wait for the power LED to turn on (about 30 seconds).
- Connect to Extender’s WiFi
On your phone, laptop, or tablet, go to WiFi settings. Connect to the network called Rockspace_EXT.
- Access Setup Page
Open a web browser. In the address bar, enter http://re.rockspace.local or 192.168.0.254.
Press Enter. - Create Login Credentials
On first setup, create a login password for your extender when prompted.

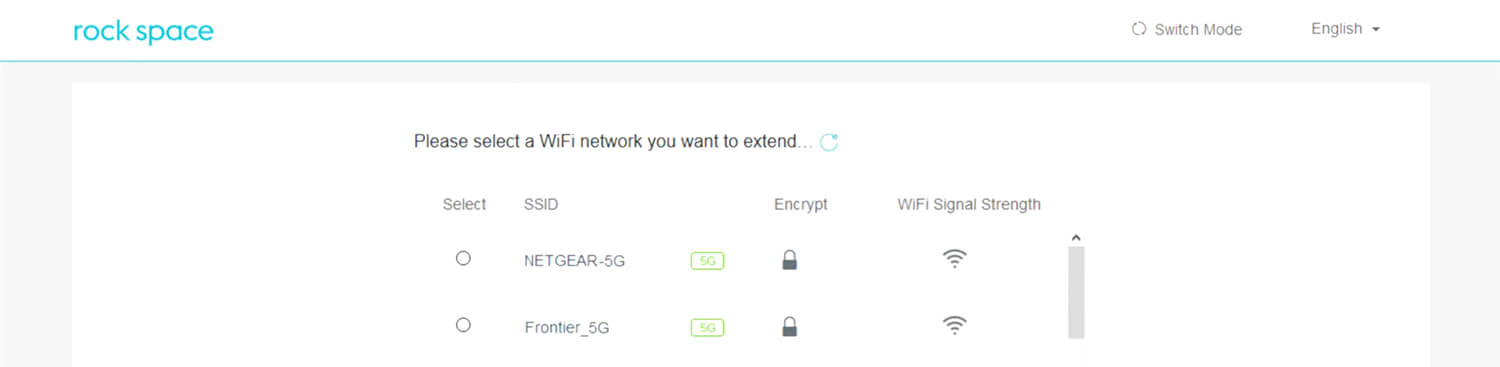
- Scan & Select Your Main WiFi
The setup page will show a list of WiFi networks nearby. Select your home/router WiFi network to extend.
- Enter Your WiFi Password
Type your main WiFi network’s password. Click Extend or Connect to proceed.
- Wait for Confirmation
The extender will configure itself (wait for two solid lights—Power & Signal).
Your extended networks will now show (e.g., YourNetwork_EXT or YourNetwork_5G_EXT).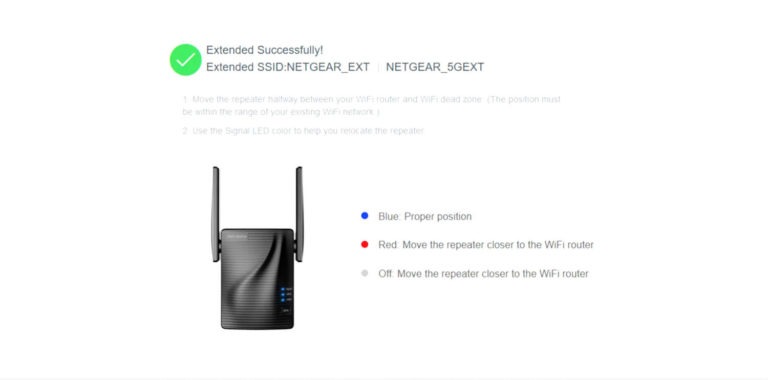
- Relocate for Better Coverage
Unplug the extender and move it to an area between your router and the WiFi dead zone.
Plug in and check the Signal LED is solid blue for best results.
If http://re.rockspace.local Doesn’t Load
- Try 192.168.0.254 in your browser’s address bar instead.
- Make sure you’re connected to the Rockspace_EXT network.
- Try with another browser/device or clear your browser cache.
Quick Troubleshooting
- Extender not connecting?
- Double-check your WiFi password for typos.
- Place extender closer to the router for setup—then relocate.
- Setup page won’t open?
- Confirm you’re connected to the extender’s WiFi (not your main network).
- Use the IP address (192.168.0.254) if the local URL fails.
- Need to reset?
- Find the reset button on your extender.
- Press and hold it for 10 seconds. Wait for lights to blink, then retry the setup.
Your Rockspace extender should now be up and running. You can manage settings or change the WiFi password by revisiting the setup page anytime!
A: Make sure you’re connected to the Rockspace_EXT WiFi. If the setup page still won’t load, try entering 192.168.0.254 in your browser’s address bar, use a different device, or clear your browser cache.
A: Yes. During setup, you can set a custom name (SSID) and password for your extended network. You can also adjust these settings later by logging in to the extender’s admin page.
A: Find the reset button on the extender. Press and hold it for 10 seconds until the lights blink. Wait for the Power LED to stabilize, then start the setup process again.